IP Camera
Posted on Fri 25 August 2023 in /hacks
I have a home assistant system and two destructive cats, so I decided keeping watchful eyes on them when I am not home would probably be a good idea in the interest of my house. I am a big advocate of free (libre) products, but I could not find a free camera for home monitoring. Furthermore, I did find a project based on buildroot called OpenIPC, which provides an open-source firmware to be flashed to many low-cost IP cameras.
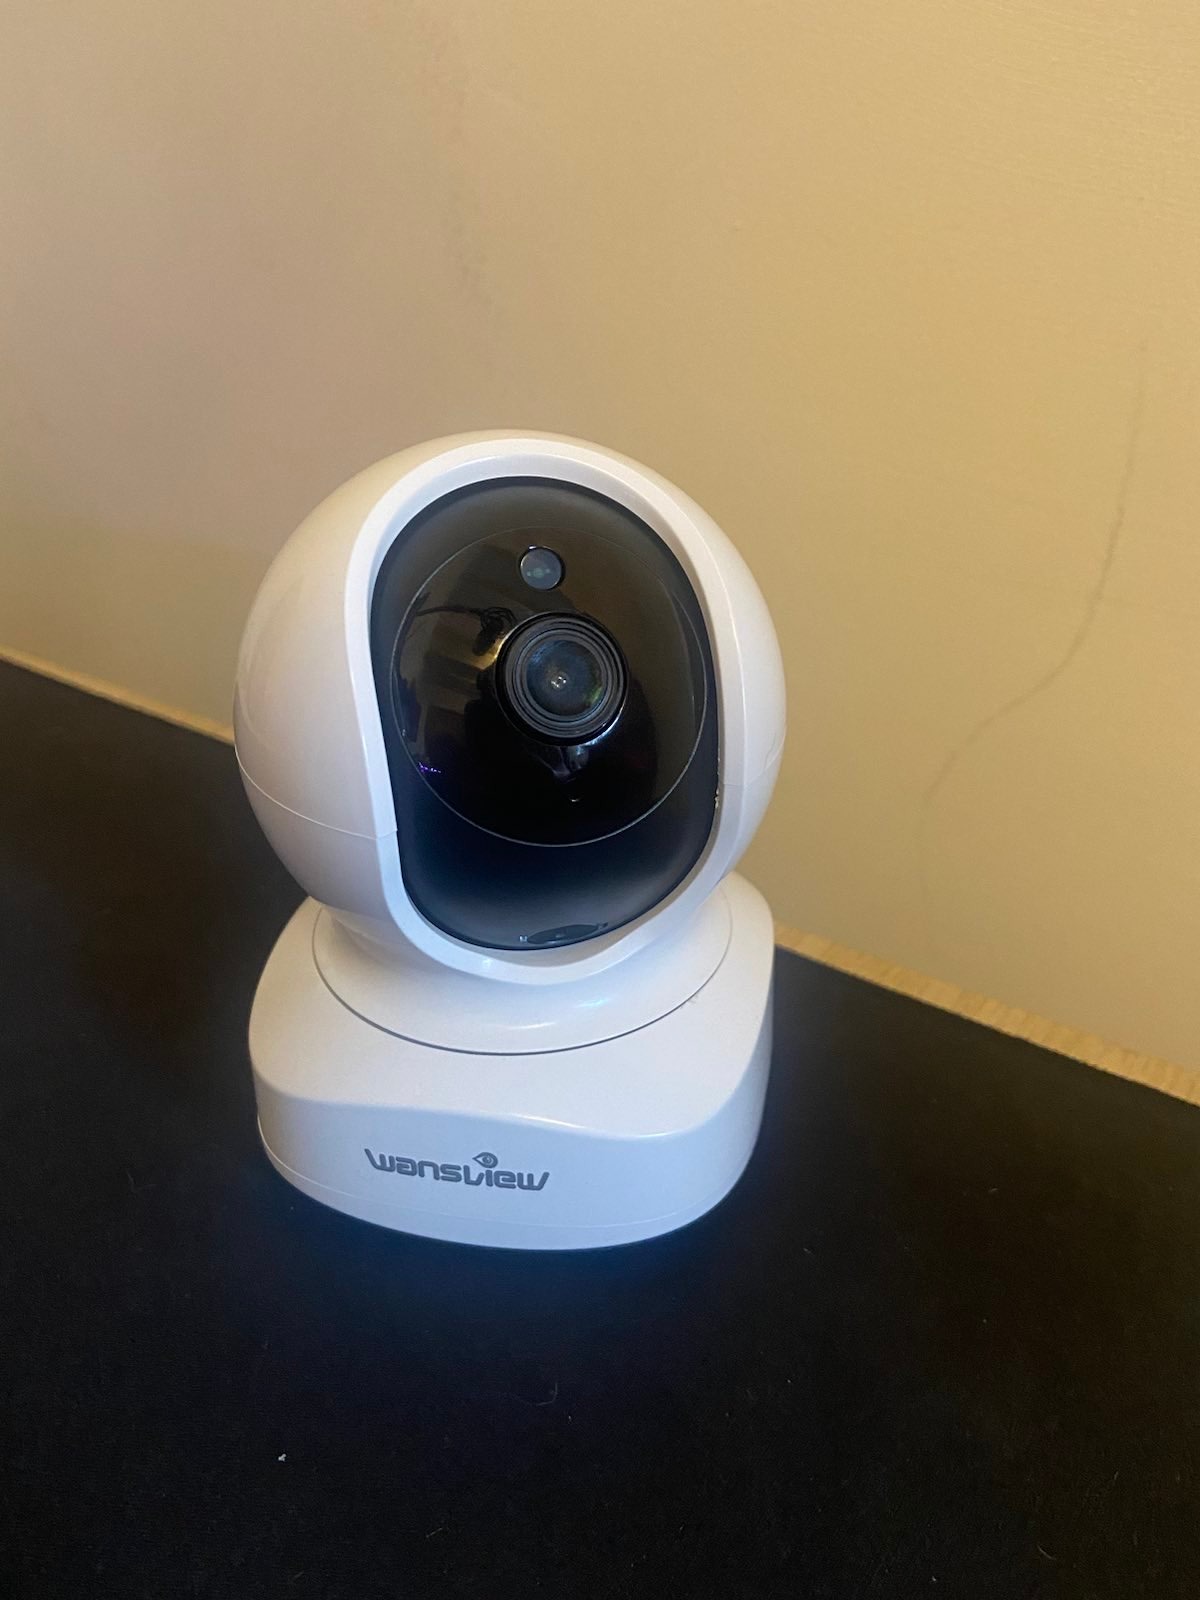
Unfortunately, cheap Chinese IP cameras rarely describe the internal sensor and system-on-chip (SoC) it uses and the models that are reported to be supported by OpenIPC I could not get (at least in my country). I bit the bullet and spent a whole £20 on an IP camera (Wanview Q5) that had:
- 1080p sensor,
- Wi-Fi,
- infrared capability, and infrared LED,
- 2 motors for vertical and horizontal panning,
- micro SD card reader,
- speaker,
- microphone.
(Roughly in order of importance to me)
Opening up
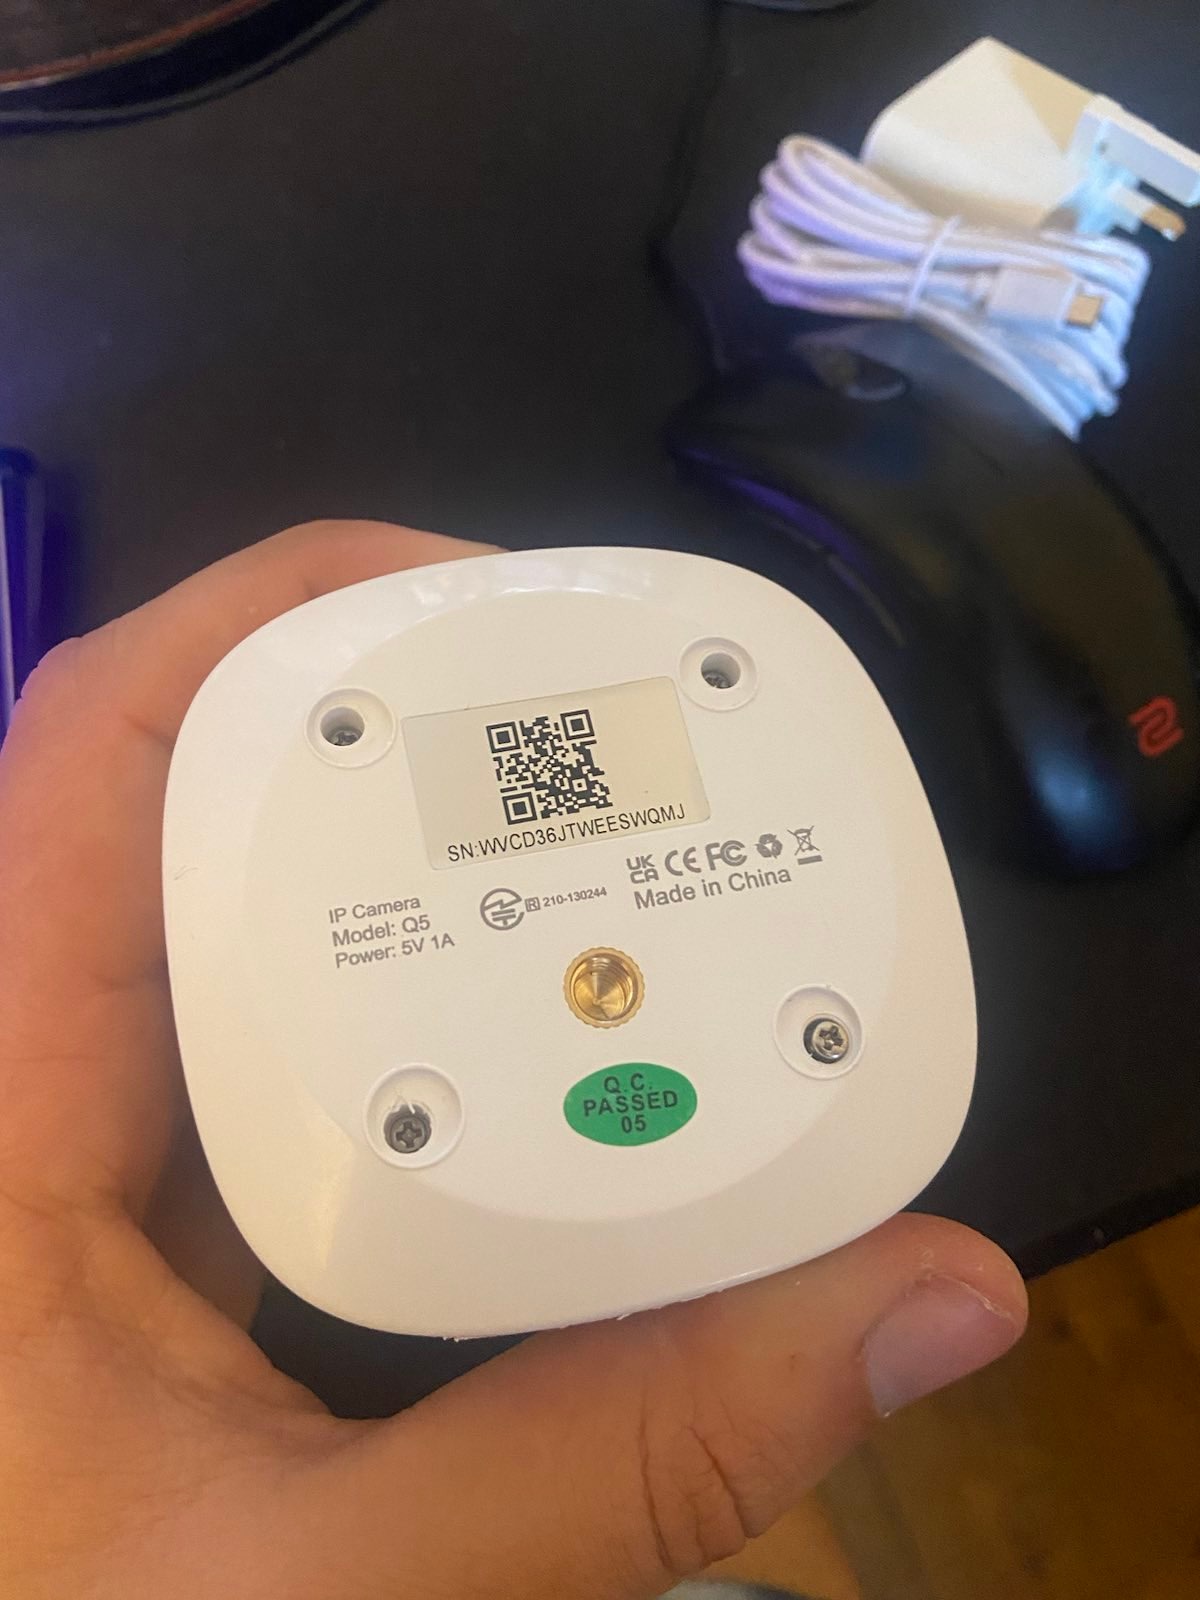
First issue I came across, was opening the device up. Underneath the stick-on feet pads, there are four screws for holding in the base of the device.
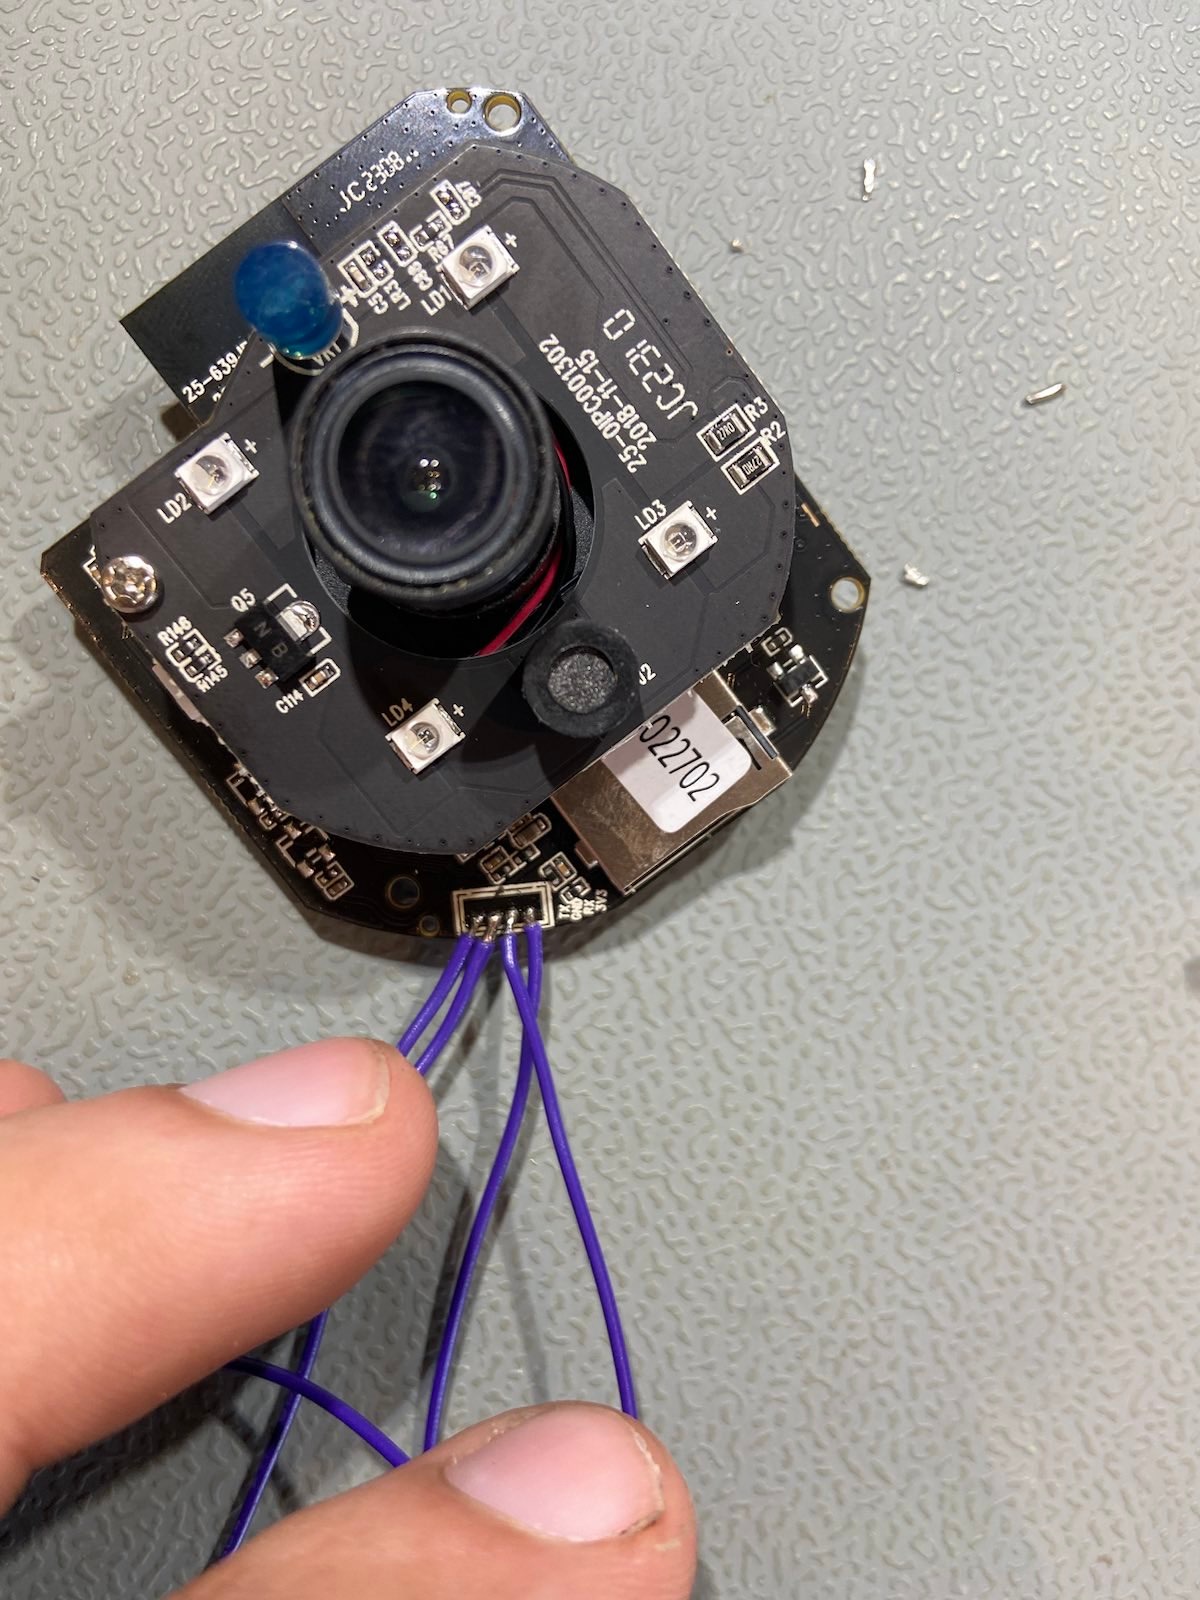
The main camera board is still not accessible from here though, after consulting a professional hammer hitter (mechanical engineer), I was able to open the device through the horizontal connection around the circumference of the camera.
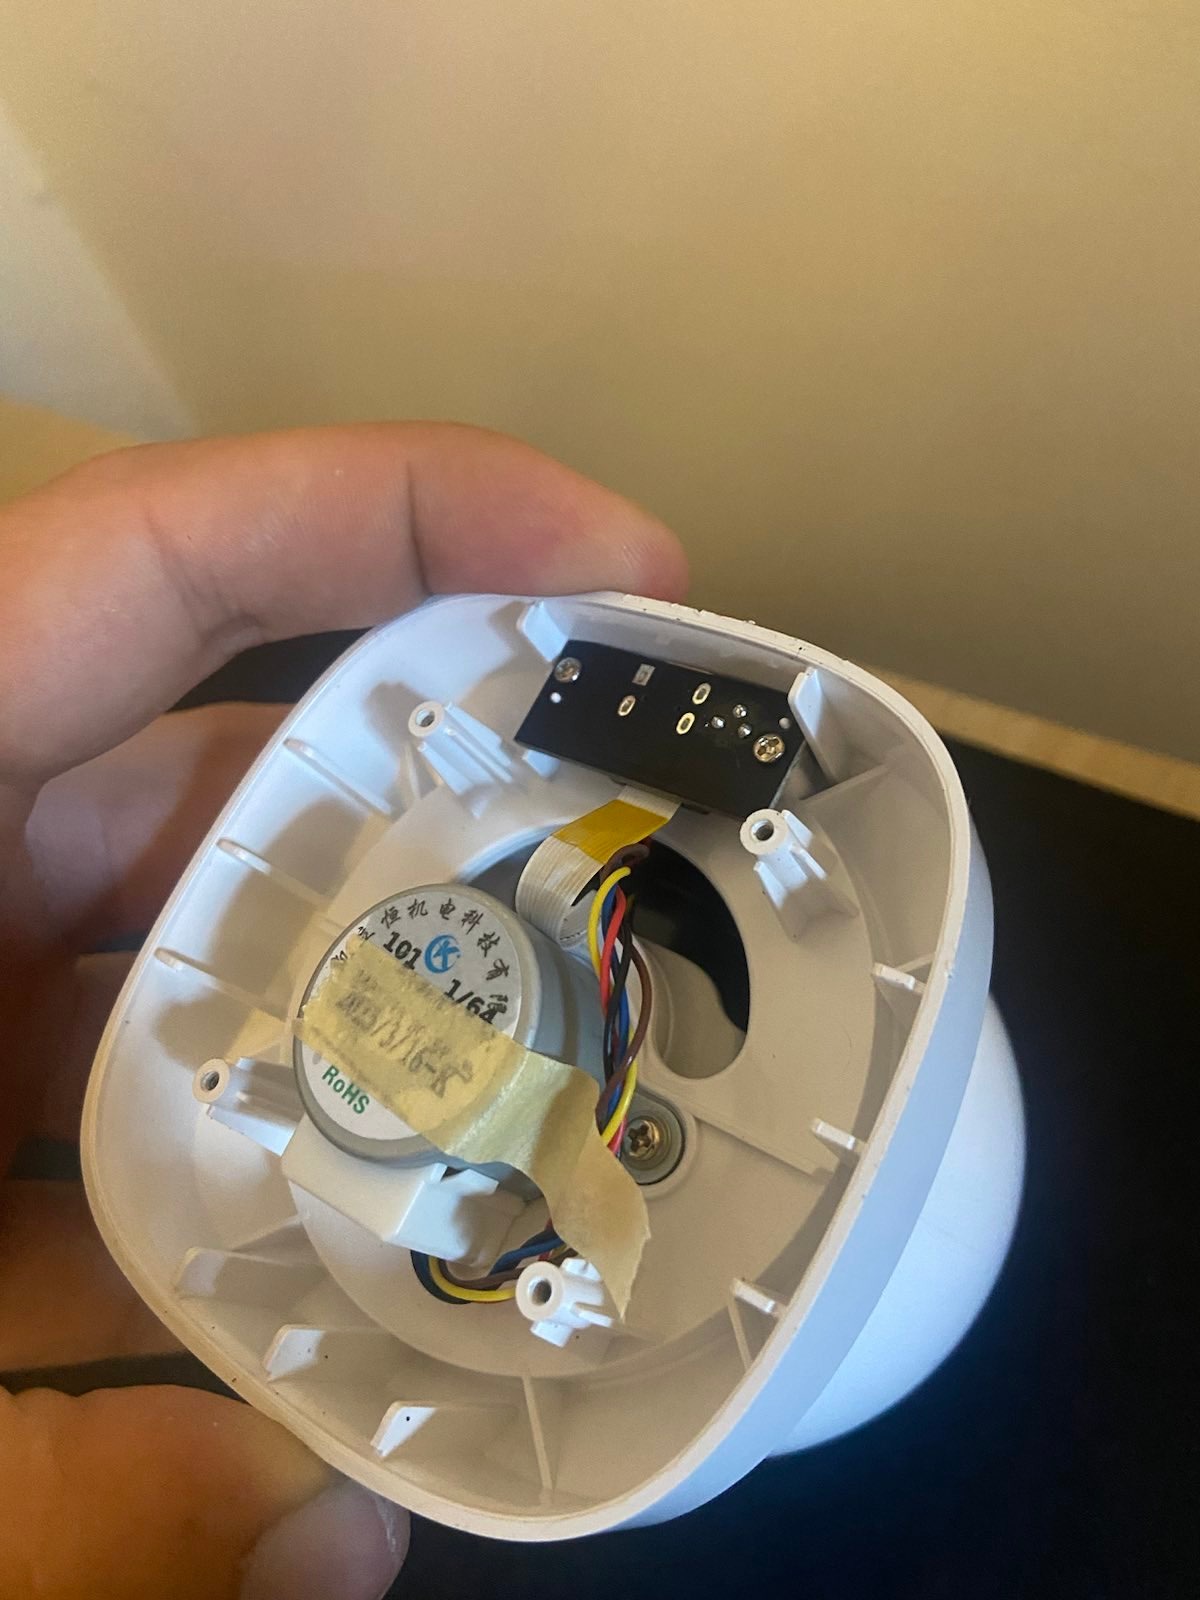
Now with the motors removed and the mainboard out I could inspect the onboard chips. The SoC was an Ingenic T31N, the sensor was unmarked.
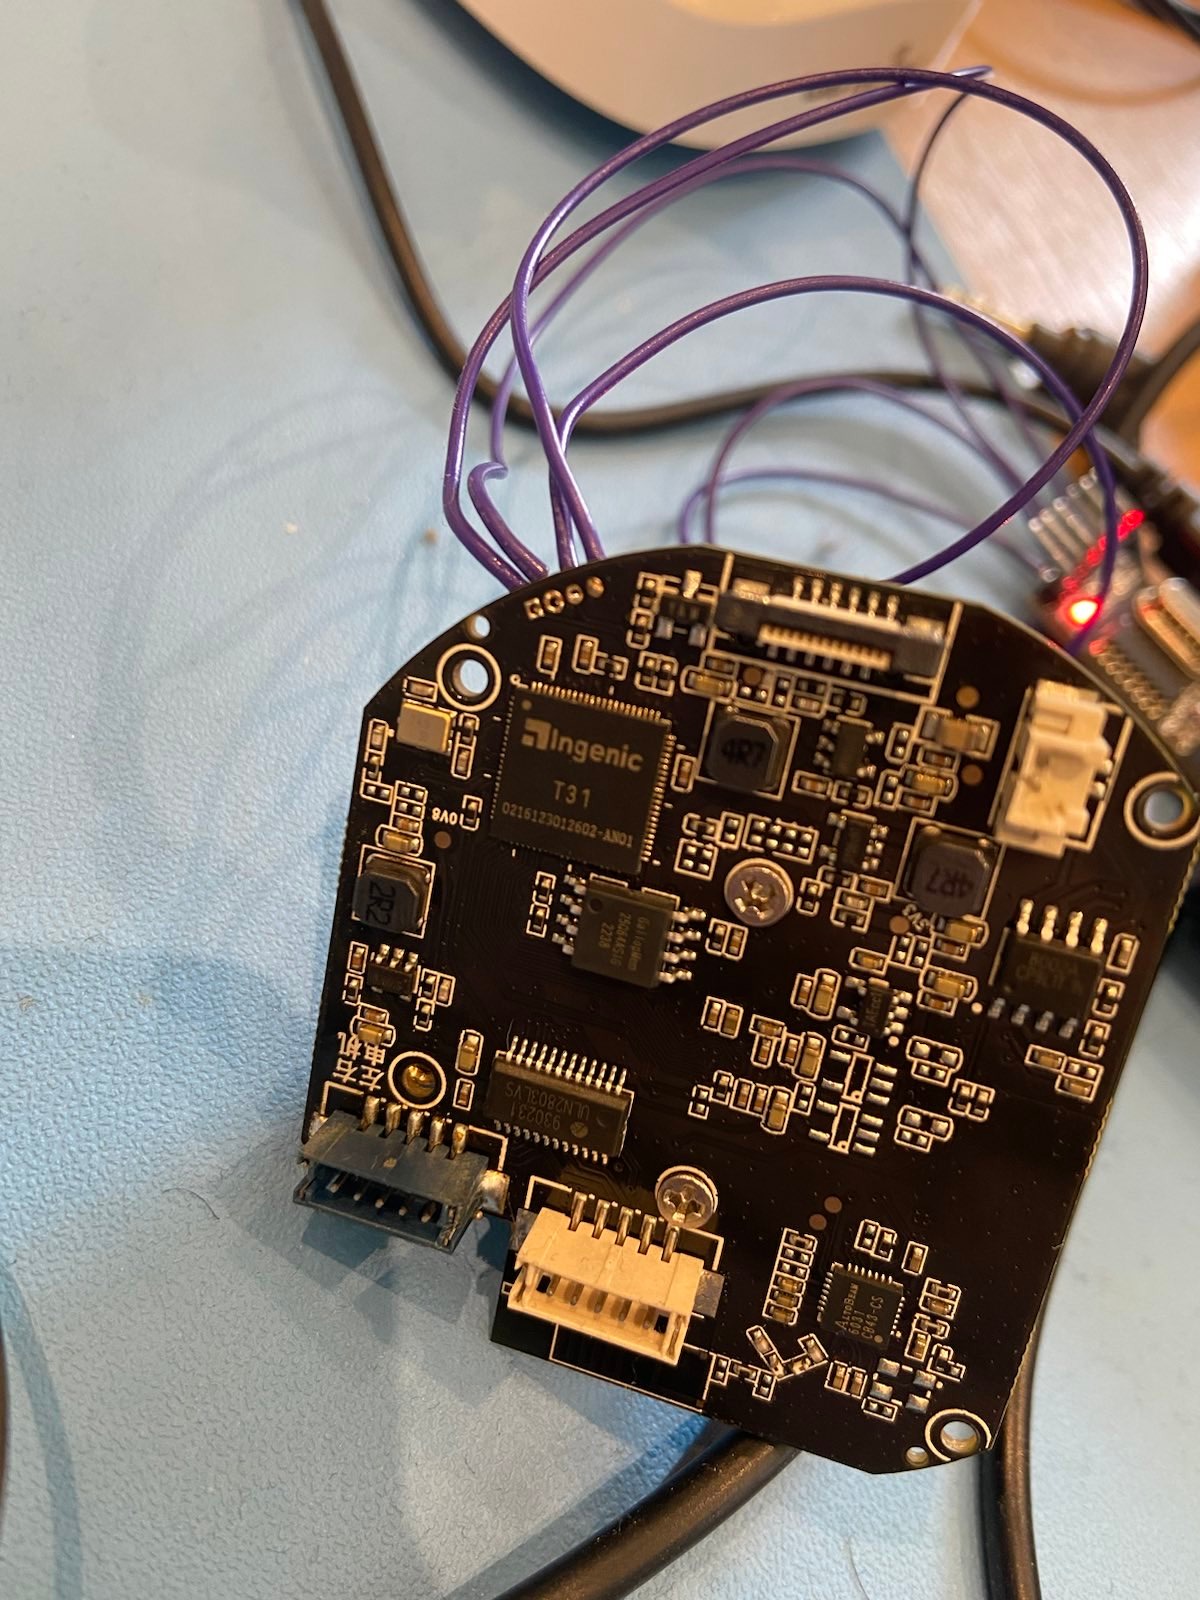
Going through OpenIPC's documentation, I saw the Ingenic T31N was well-supported, which was lucky, but not improbable as many of these cheap Chinese cameras use similar hardware.
Flashing Firmware
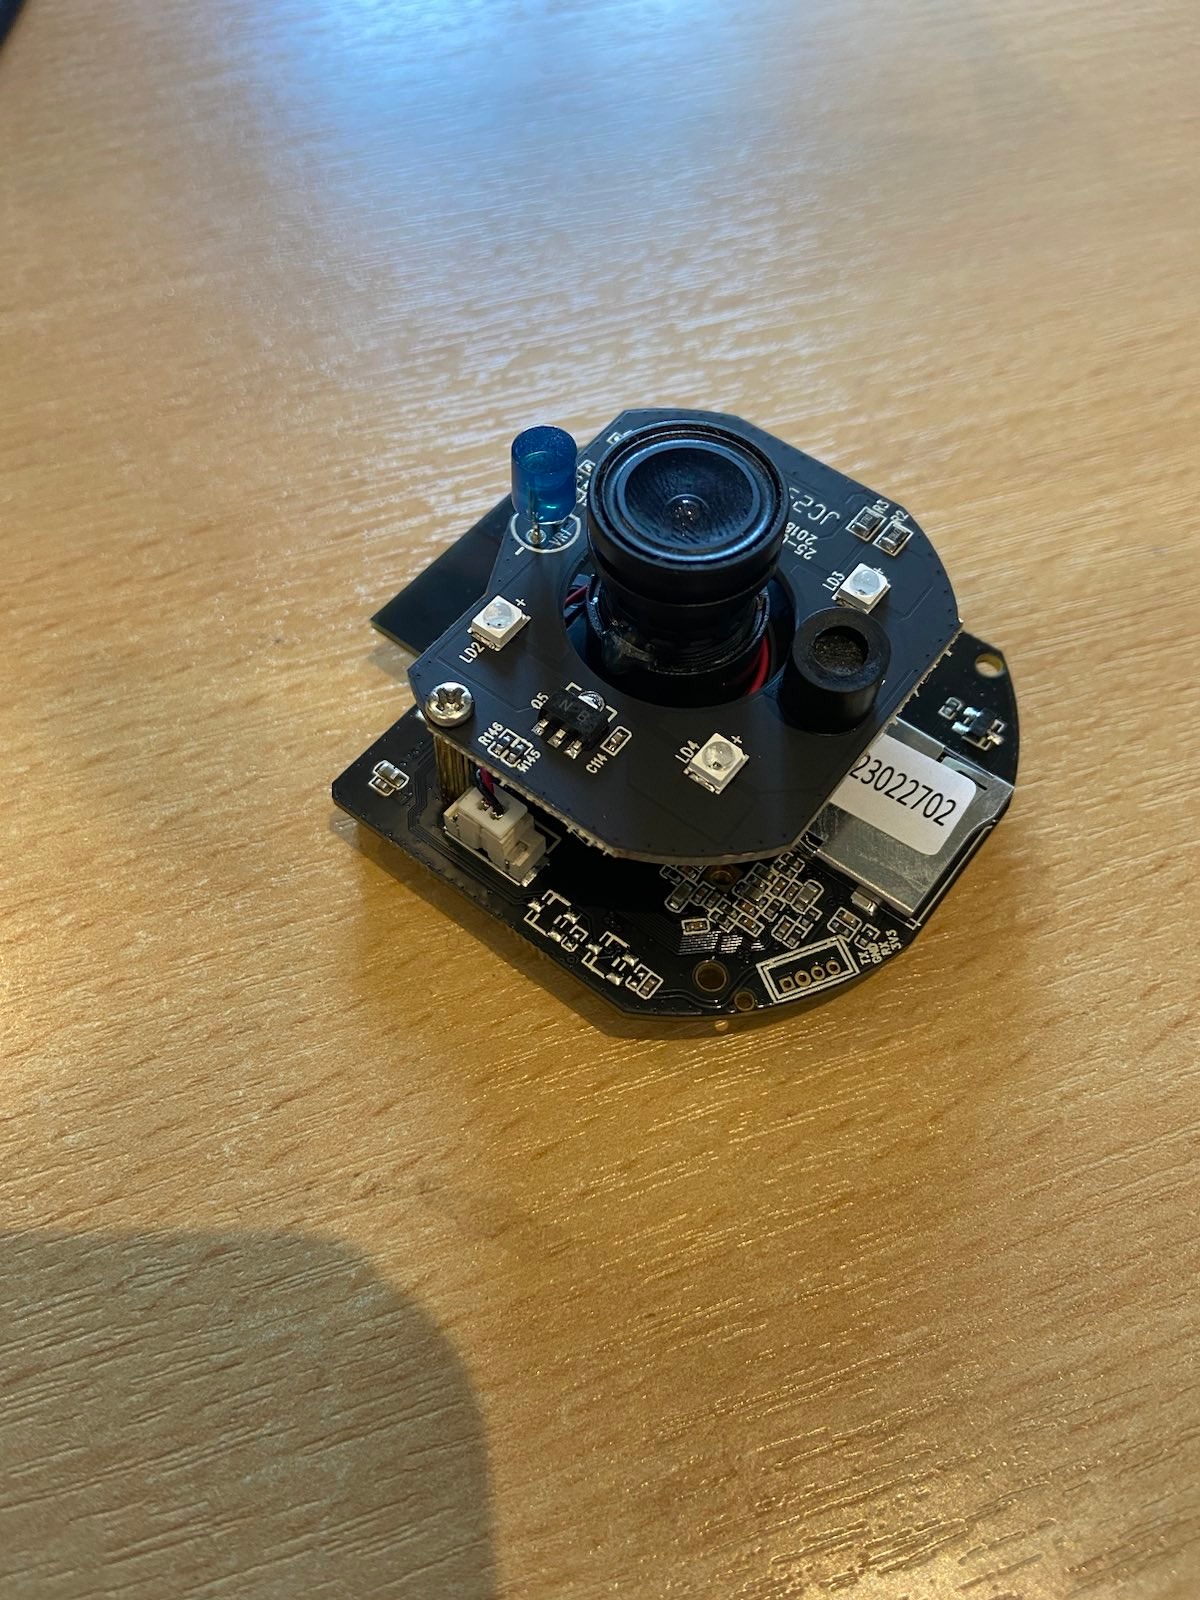
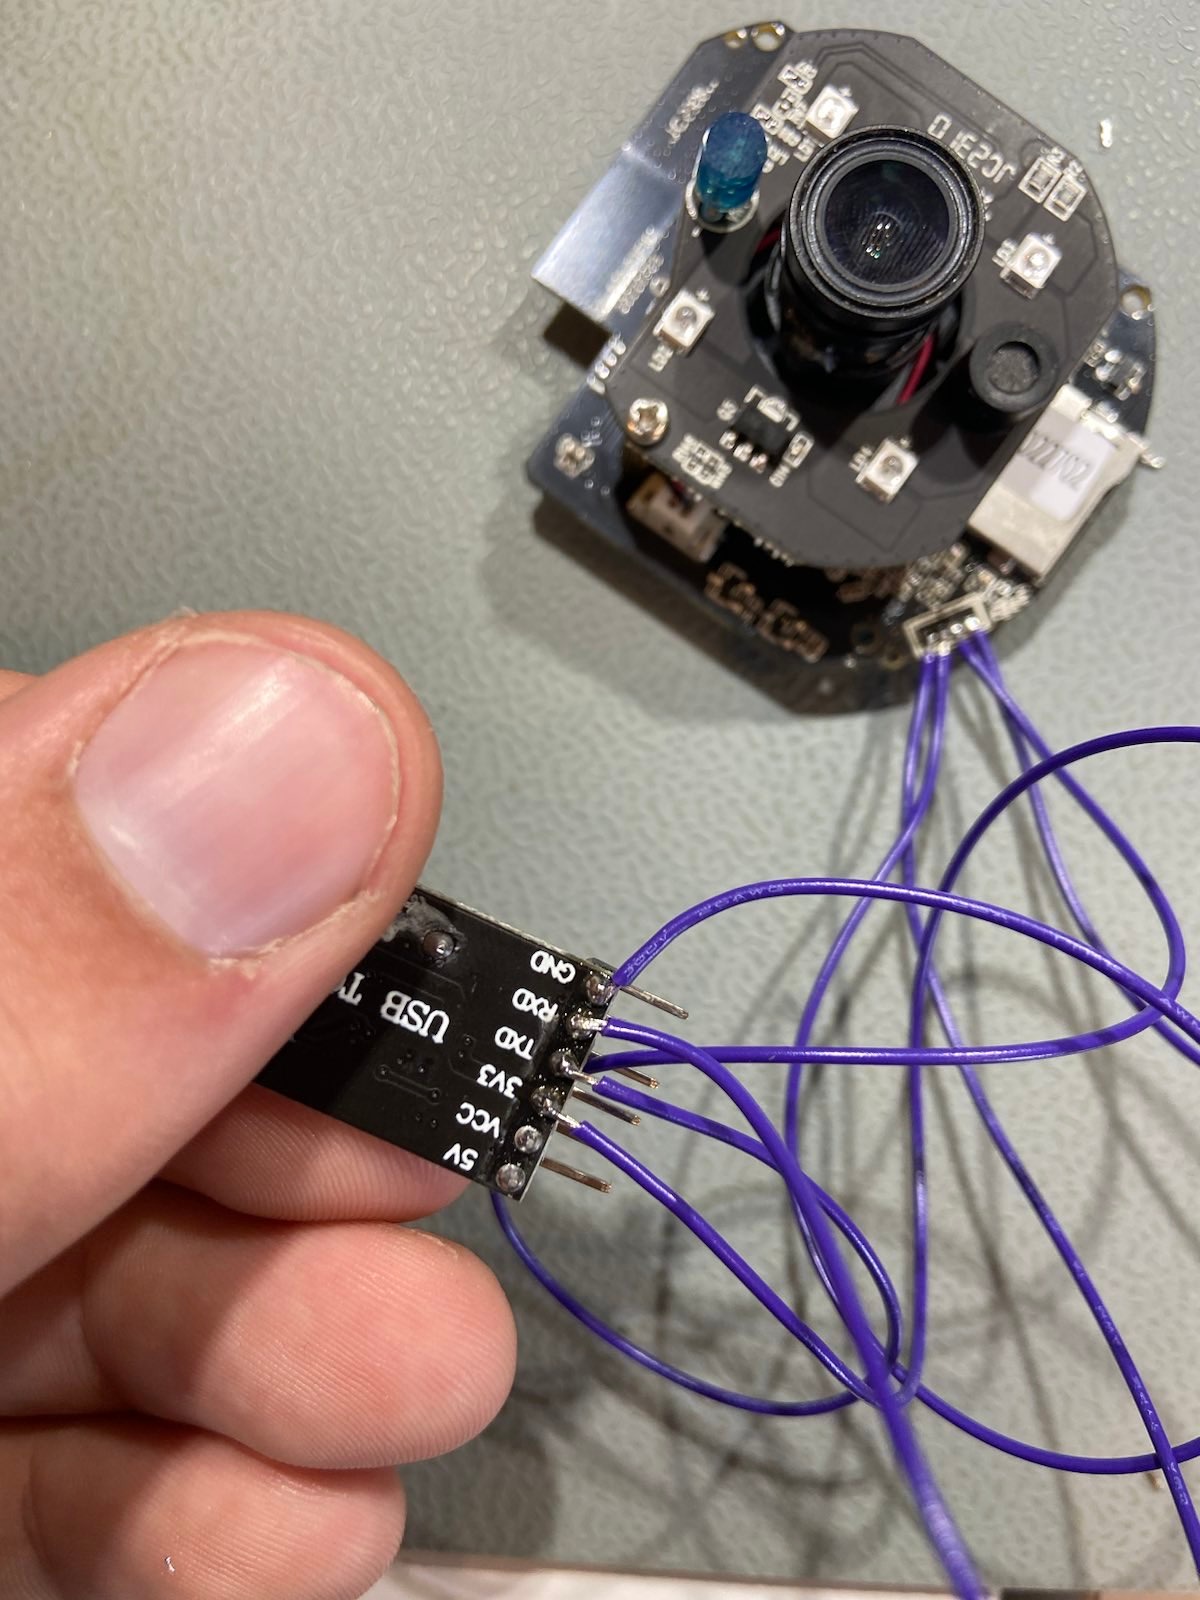
Handily, the RX, TX, GND and 3V pins were labelled on the mainboard silkscreen, so I soldered a TTY adapter to these pins (remembering to swap the RX and the TX!).
I inserted a micro SD card and backed up the existing (evil, propriety, watch-from-Xi-Jinping-desktop) firmware from the device, using the documentation from OpenIPC. I mainly did this as it was so strongly recommended by OpenIPC community and perhaps I could rescue it from bricking, but I will never connect, much less use it with the default firmware. After I copied this backup on to my machine, I prepared the micro SD card for copying the firmware over.
I inserted the microSD card into the camera and plugged the TTY adapter into my machine. As hard as I tried, I could not open a GNU screen session and catch the boot process before it boots into (evil, proprietary, etc.) Linux. Instead, I switched to using minicom as this keeps the session open after unplug, and reconnects once plugged in again, which is important as the power is being supplied to the camera using the UART so replugging the adapter will reboot the device. Holding Ctrl-C down I was able to open the bootloader and could follow the rest of the instructions given by OpenIPC without issue.
Driver Nightmare
After first boot, a grep had failed, which was searching for the sensor of the camera. Bad news. This means the sensor I have was not in the current build for this device. Having spoken to the incredibly helpful community on the matter, I was able to identify the sensor I had and cronxy added the driver (which was already in this project (OpenIPC), but not this build) as a default, so if you're following in my footsteps, you should have no issue here.
Next issue was the Wi-Fi. I first noticed the interface was not appearing, so I went back to the mainboard to see if I could see a chip that would be my wireless network chip. After a bit of research, I concluded that AltoBeam 6031 was my Wi-Fi chip. Good news and bad news; bad news, there is no mainline Linux kernel driver for this chip, good news is there is an out-of-tree driver. More bad news, the driver looks rushed, poorly written and not in a usable state. Unfortunately I caved and decided to use the propriety driver for this chip that came with the device. I would really like to fix this, but unfortunately, this seems like a lot of work and I don't have the time at the moment.